
How to create an EX90 console cable and console into a unit? Cisco EX90: The Cisco TelePresence System EX90 series transforms the workplace by combining work, communications, and collaboration-all on the desktop with just the touch of a finger. The EX Series is an all-in-one tool that streamlines the desktop so you can fluidly move from individual work on your laptop, to a quick video call with a colleague, to problem-solving over shared spreadsheets. By the way, this guide will also work with the Cisco EX60. The EX90 is designed for the team leader or manager for immediate presence with customers, partners, and employees, while the EX60 can be scaled throughout the organization, designed especially for the knowledge worker or individual contributor.
The tools you need to make an EX90 console cable:
- 1.6″ Wire Stripper
- 2. Solder
- 3. Soldering Iron
- 4. DB9 Enclosure
- 5. RS232 to TTL/CMOS converter
- 6. Cable with 8P8C (RJ45) on one end
Creating a Console Cable and Making a Console Connection
Step1: Gather the necessary tools
- 1–Soldering Iron
- 2–Solder
- 3–DB9 Enclosure.
- 4–RS232 to TTL/CMOS converter.
- 5–Cable w/RJ45 connector on one end Any type of cable with an 8P8C (RJ45) connector could be used as long as pins 1,2,7 & 8 are connected. A standard RJ45 cable is being used here.
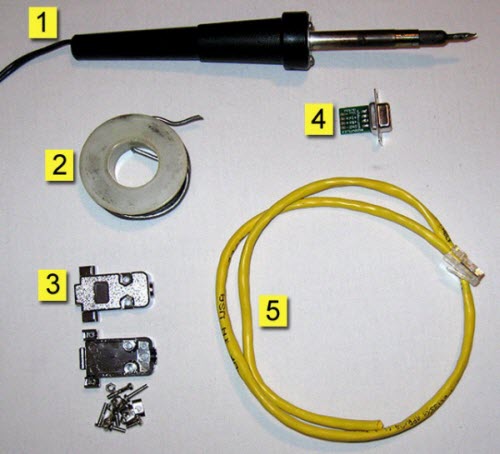
You will also need wire strippers and possibly a screwdriver (depending on which DB9 enclosure you are using).
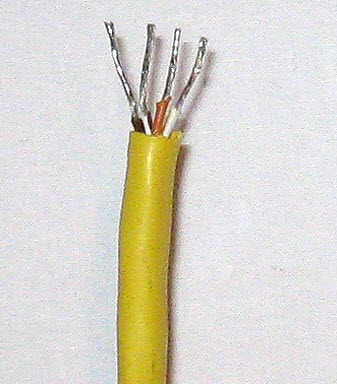
Step2: Prep the cable. Strip the sheathing from the wires that correspond to pins 1, 2, 7 & 8.
Step3: Connect the RS232 to TTL/CMOS converter.Connect the RS232 to TTL/CMOS converter to the cable and solder the connections.
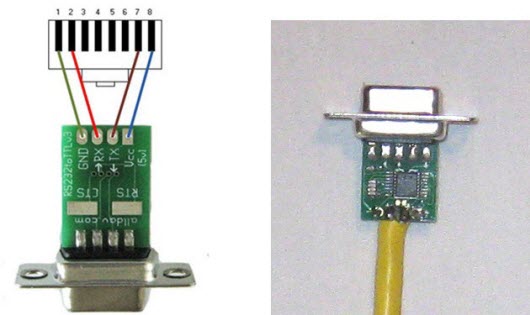
Note: The colors used in the wiring diagram don’t correspond to the color of the actual wires.
Step4: Install the Enclosure The EX90 console is now complete. The subsequent steps will cover making a console connection.
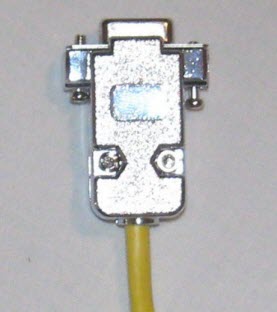
Step5: Make a Console Connection. Locate the Console Port. The EX90 console port is an 8P8C (RJ45) connection and is located on the bottom left corner of the unit.
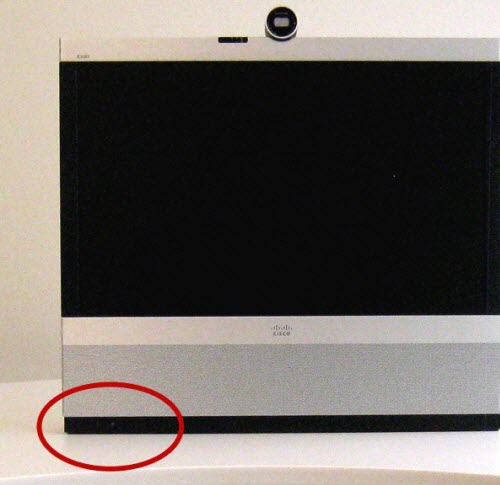
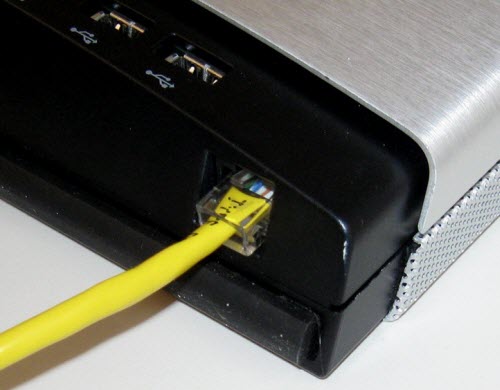
Step6: Connect to the Console Port. Plug the 8P8C (RJ45) end into the console port. You’ll have to lean the unit forward to plug the cable in. It might be a little awkward to do alone. If someone else is available, ask for their assistance. As a last resort, lay the unit down. Ensure you have something soft (like a towel) to lay the unit on.
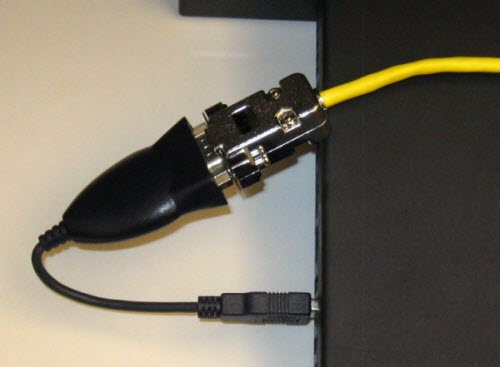
Step7: Connect the DB9 to a USB serial adapter and connect to a laptop/PC.
Step8: Configure a Terminal Emulator Session. Configure your terminal emulator with the following parameters:
- Baud=38400
- Data bits=8
- Parity=none
- Stop bits=1
- Flow Control=none
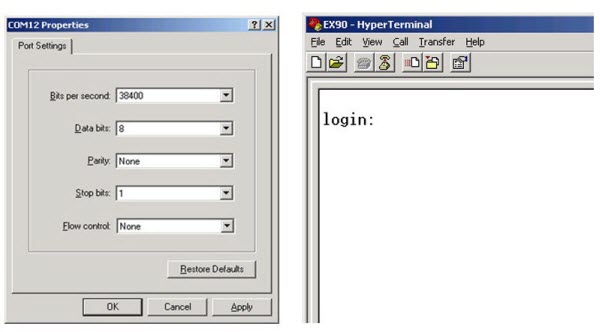
Note: The example uses HyperTerminal for Windows; configuring your terminal emulator may vary slightly. You should now be at a login prompt when you connect with the terminal emulator.
Reference from https://www.ifixit.com/Guide/Creating+a+Console+Cable+and+Making+a+Console+Connection/9282
More Topics Related to Make Cisco Console Cables:
How to Connect the Console Port to a PC?
How to Connect to a Cisco Standard Console Port (RJ-45)?


