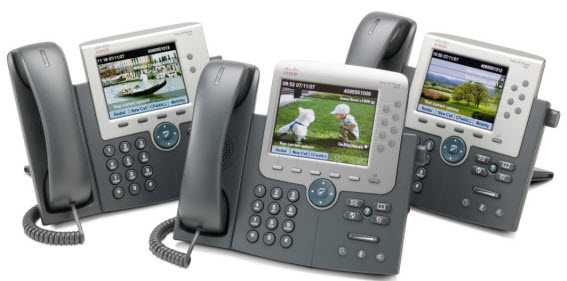
Before you install a Cisco Unified IP phone, you must decide how to configure the phone in your network. Then you can install the phone and verify its functionality. There are two smart ways to configure Cisco IP Phones provided by proficient Cisco fans.

The First Way to Configure a Cisco IP Phone
Router(config)#telephony-service setup—-Start
ipPhone configuration
—Cisco IOS Telephony Service Setup—
Do you want to setup DHCP service for your IP Phones? [Yes/no]: yes—configure DHCP
Configuring DHCP Pool for Cisco IOS Telephony Services:
IP network for telephony-
service DHCO Pool: 192.168.2.0
Subnet mask for DHCP network: 255.255.255.0
TFTP Server IP address (Option 150): 192.168.2.1
Default Router for DHCP Pool: 192.168.2.1
Do you want to start telephony-Service setup? [Yes/no]: yes—-
Configuring Cisco IOS Telephony Service:
Enter the IP source address for Cisco IOS Telephony Services: 192.168.2.1
Enter the Skinny Port for Cisco IOS Telephony Service: [2000]: —-Voice Port
How many IP Phones do you want to configure: [0]: 2
Do you want dual-line extensions assigned to phones? [Yes/no]: yes
What Language do you want on IP phones?
0 English
1 French
2 German
3 Russian
4 Spanish
5 Italian
6 Dutch
7 Norwegian
8 Portuguese
9 Danish
10 Swedish
11 Japanese
[0]: 0
Which Call Progress tone set do you want on IP Phones:
0 United States
1 France
2 Germany
3 Russia
4 Spain
5 Italy
6 Netherlands
7 Norway
8 Portugal
9 UK
10 Denmark
11 Switzerland
12 Sweden
13 Austria
14 Canada
15 Japan
[0]: 0
What is the first extension number you want configure: 800—-extension number
Do you have Direct-Inward-Dial service for all your phones? [Yes/no]: yes
Enter the full E.164 number for the first phone: 888
Do you want to forward calls to a voice message service? [Yes/no]: yes —-voice message
Enter extension or pilot number of the voice message service: 899
Call forward No Answer Timeout: [18]:
Do you wish to change any of the above information? [yes/no]: no —-no change
CNF-FILES: Clock is not set or synchronized,
Retaining old versionStamps
—-Setup completed config—
Router(config)#
*Mar 1 00:23:46.743: %LINK-3-
UPDOWN: Interface ephone_dsp DN 1.1, changed state to up
*Mar 1 00:23:46.747: %LINK-3-
UPDOWN: Interface ephone_dsp DN 1.2, changed state to up
*Mar 1 00:23:46.747: %LINK-3-
UPDOWN: Interface ephone_dsp DN 2.1, changed state to up
*Mar 1 00:23:46.751: %LINK-3-
UPDOWN: Interface ephone_dsp DN 2.2, changed state to up
Router#show run
Building configuration…
!
Ip dhcp pool ITS
Network 192.168.2.0 255.255.255.0
Option 150 ip 192.168.2.1
Default-router 192.168.2.1
!
!
Telephony-service
Max-ephones 2
Max-dn 2
Ip source-address 192.168.2.1 port 2000
Auto assign 1 to 2
Create cnf-files version-stamp Jan 01 2002 00:00:00
Dialplan-pattern 1 8.. extension-length 3
Voicemail 899
Max-conferences 4 gain -6
transfer-system full-consult
!
!
Ephone-dn 1 dual-line
Number 800
Call-forward busy 899
Call-forward noan 899 timeout 18
!
!
Ephone-dn 2 dual-line number 801
Call-forward busy 899
Call-forward noan 899 timeout 18
!
!
Ephone 1
!
!
!
Ephone 2
!
!
!
Line con 0
Line aux 0
Line vty 0 4
!
!
End
Router#show telephony-service?
Admin Show telephony-
Service admin username and password
All Show telephony-service details
Dial-peer Show telephony-service dialpeers
Directory-entry Show telephony-service directory-entry
Ephone Show ephone configuration
Ephone-template Show ephone-
Template configuration
Tftp-bindings Show telephony-service tftp-
Server bindings
Voice-port Show telephony-service voice ports
|Output modifiers
<cr>
Router#show telephony-service
CONFIG (Version=3.3)
======================================
Version 3.3
Cisco CallManager Express
For on-line documentation please see:
www.cisco.com/uniercd/cc/td/doc/product/access/ip_ph/ip_ks/index.htm
ip sourc-address 192.168.2.1 port 2000
max-ephones 2
maxx-dn 2
max-conferences 4 gain -6
dspfarm units 0
hunt-group report delay 1 hours
max-redirect 5
dialplan-pattern 1 8.. extension-length 3
voicemail 899
time-format 12
date-format mm-dd-yy
timezone 0 Greenwich Standard Time
keepalive 30
timeout interdigit 10
timeout busy 10
timeout ringing 180
caller-id name-only: enable
edit DN through Web: disabled.
Edit TIME through web: disabled.
Log (table parameters):
Max-size: 150
Retain-timer: 15
Create cnf-fils version-stamp Jan 01 2002 00:00:00
Transfer-system full-consult
Auto assign 1 to 2
Local directory service: enabled.
The Second Way to Configure Cisco IP Phones
The first step: to Configure DHCP
R1(config)#ip dhcp pool CME
R1(dhcp-config)#network 192.168.1.0 /24
R1(dhcp-config)#?
DHCP pool configuration commands:
Accounting Send Accounting Start/Stop messages
Bootfile Boot file name
class Specify a DHCP class
client-identifier Client identifier
client-name Client name
default-router Default routers
dns-server DNS servers
domain-name Domain name
exit Exit from DHCP pool configuration mode
hardware-address Client hardware address
host Client IP address and mask
import Programatically importing DHCP option parameters
Lease Address lease time
Netbios-name-server NetBIOS (WINS) name servers
Netbios-node-type NetBIOS node type
Network Network number and mask
Next-server Next server in boot process
No Negate a command or set its defaults
Option Raw DHCP options
Origin Configure the origin of the pool
Relay Function as a DHCP relay
Subnet Subnet allocation commands
Update Dynamic updates
Utilization Configure various utilization parameters
Vrf Associate this pool with a VRF
R1(dhcp-config)#default-router 192.168.1.1
R1(dhcp-config)#option 150 ip 192.168.1.1
R1(dhcp-config)#exit
The second step: to configure telephony service
R1(config)#telephony-service
R1(config-telephony)#max-ephones 2
R1(config-telephony)#max-dn 2
R1(config-telephony)#auto assign 3 to 4
R1(config-telephony)#ip source-address 192.168.1.1 port 2000
R1(config-telephony)#exit
The third Step: to configure ephone
R1(config)#ephone-dn 1
R1(config-ephone-dn)#number 111
R1(config-ephone-dn)#exit
R1(config)#ephone-dn 2
R1(config-ephone-dn)#number 112
R1(config-ephone-dn)#exit
More Related Cisco IP Phone Tips:
How to Configure a Cisco Unified IP Phone 7921 with Call Manager Express?
Top 5 VoIP Concepts to Know for CCNA Voice—VoIP Basic for CCNA Voice Exam


